How to Convert AVI to MP4 (H.264 / HEVC) on Windows 11/10
We consolidated Free Video to Audio Converter for Windows, Free Audio Converter, Easy Audio Extractor, Easy Video Switch, and Easy YouTube to MP3 Converter into one unified Windows x64 application: Free Video & Audio Converter.
All 428 output presets across Video, Audio, Devices, and Images—along with visual trimming, merging, cropping, subtitle editing, custom watermarks, target file-size compression, local AI upscaling, and DVD/Blu-ray authoring—are included for free.
How to Do It in Free Video & Audio Converter (Step by Step)
-
Step 1: Download Free Video & Audio Converter
Install and launch Free Video & Audio Converter on Windows 11 or Windows 10 (64-bit).
-
Step 2: Add Video, Audio, or YouTube URL
Drag local files/folders into the queue or paste a public URL via YouTube / URL.
-
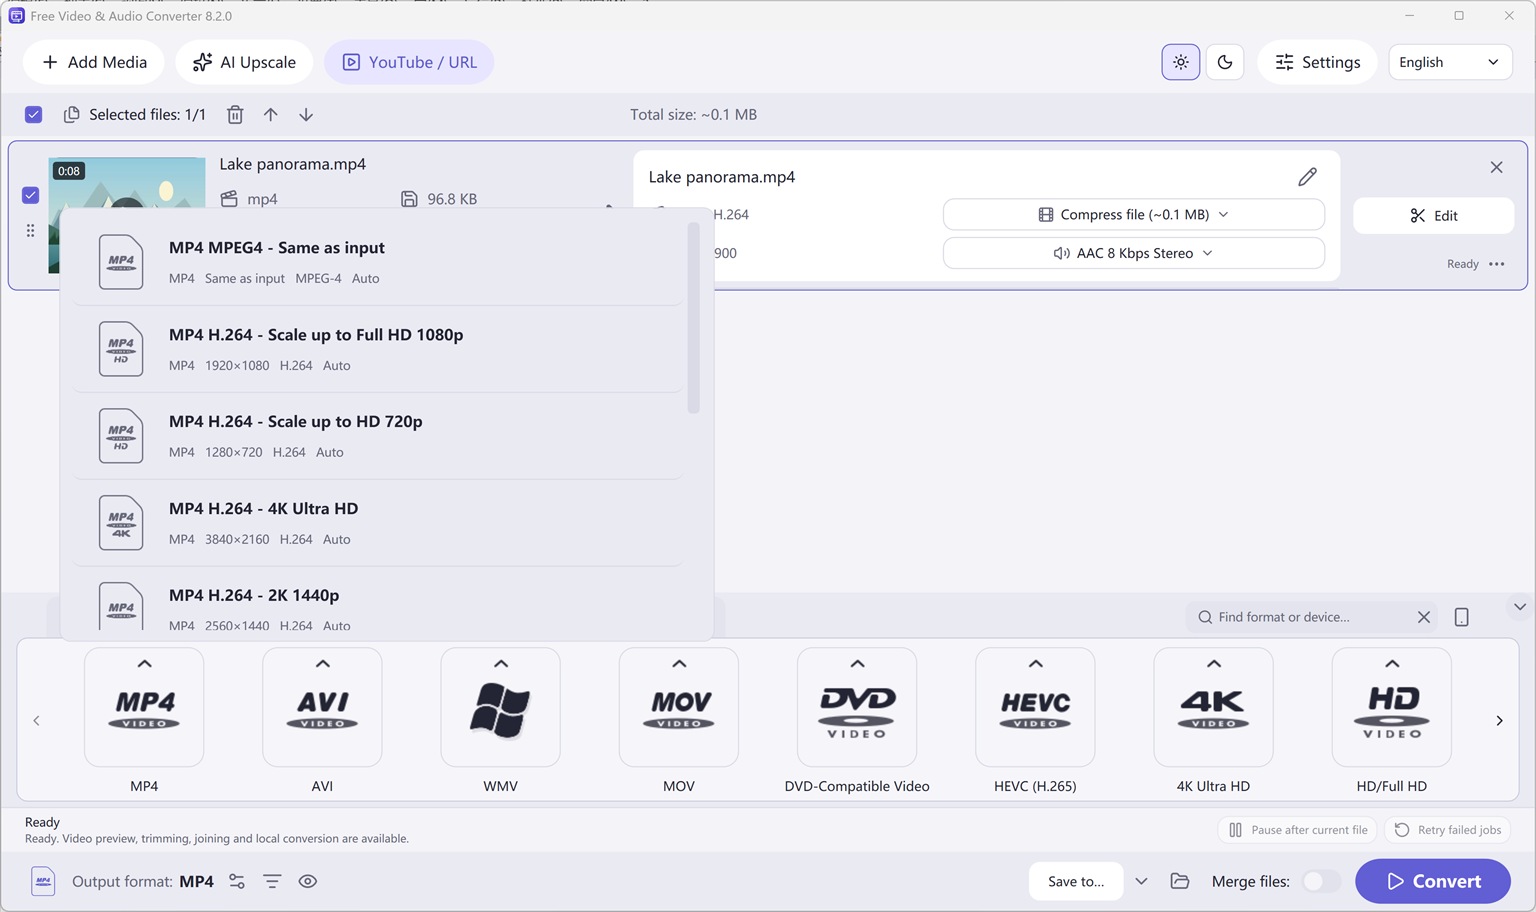
Step 3: Choose Output Format & Convert
Select your target preset (such as MP3, FLAC, WAV, or MP4) and click Convert.
Button names in the guide below may differ slightly from the current version. In Free Video & Audio Converter, drag your files into the window, choose a format at the bottom and click Convert.
More Details & Tips
In the browser: a short file can be finished online. Open the tool from the link in this site’s front page, or read the new how-to posted here.
Introduction
Many portable media devices do not support AVI, while MP4 is a video format commonly found on many mobile players such as iPhone, iPod, iPad, PSP, etc. and cell phones because of its high compression and high quality output. With Easy Video Switch, you can easily convert AVI to MP4 format for easy playback or online posting.
Step 1. Input Video Files
Click “Add” and 3 ways can be applied to add video file: “Add Files” is for one or more video files; “Add Folder” is for the folder containing video files; “Add Folder Tree” is for the folder along with its subfolders. To delete them from the list by “Remove”/”Clear”.
Tips: All the files will be listed in order of input by default. If you need to arrange the files in order, just use the “Up” & “Down” buttons to move it up and down in the list.
Step 2. Set Output Format & Quality
In “Profiles” menu, select the device you want to play the video on and you can see the details of the profile you select in the “Option Summary” panel at the right. If you know exactly the format your device supports, you can directly choose the output format in “Container” menu. To edit the parameters of the profiles, click “New/Edit” and change the settings in the “Profile Editor” Window. You are allowed to choose the video and audio codec as well as the encoder to use. To change the codec settings, click “Video and Audio Options” and set the options as you want. Choose output path by “Browse”.
Step 3. Start Conversion
When all settings done, click “Start” to start video conversion.
More Tools
To download videos from 300+ video sharing wesites, click “Video Downloader” tab.
You are also allowed to trim the video by “Trim” and to apply effects and add delays, click “Effects” and “Delays”.
It also allows you to rip DVD-Video. Just insert you video DVD or Blu-ray disc and click “DVD Ripper” tab to use the ripper.
Click “Tools” button and you will find more functions that may come helpful: File Info, Dub Video, Video to GIF and Watermark.