How to Convert Audio Files Between MP3, FLAC, WAV, M4A & OGG
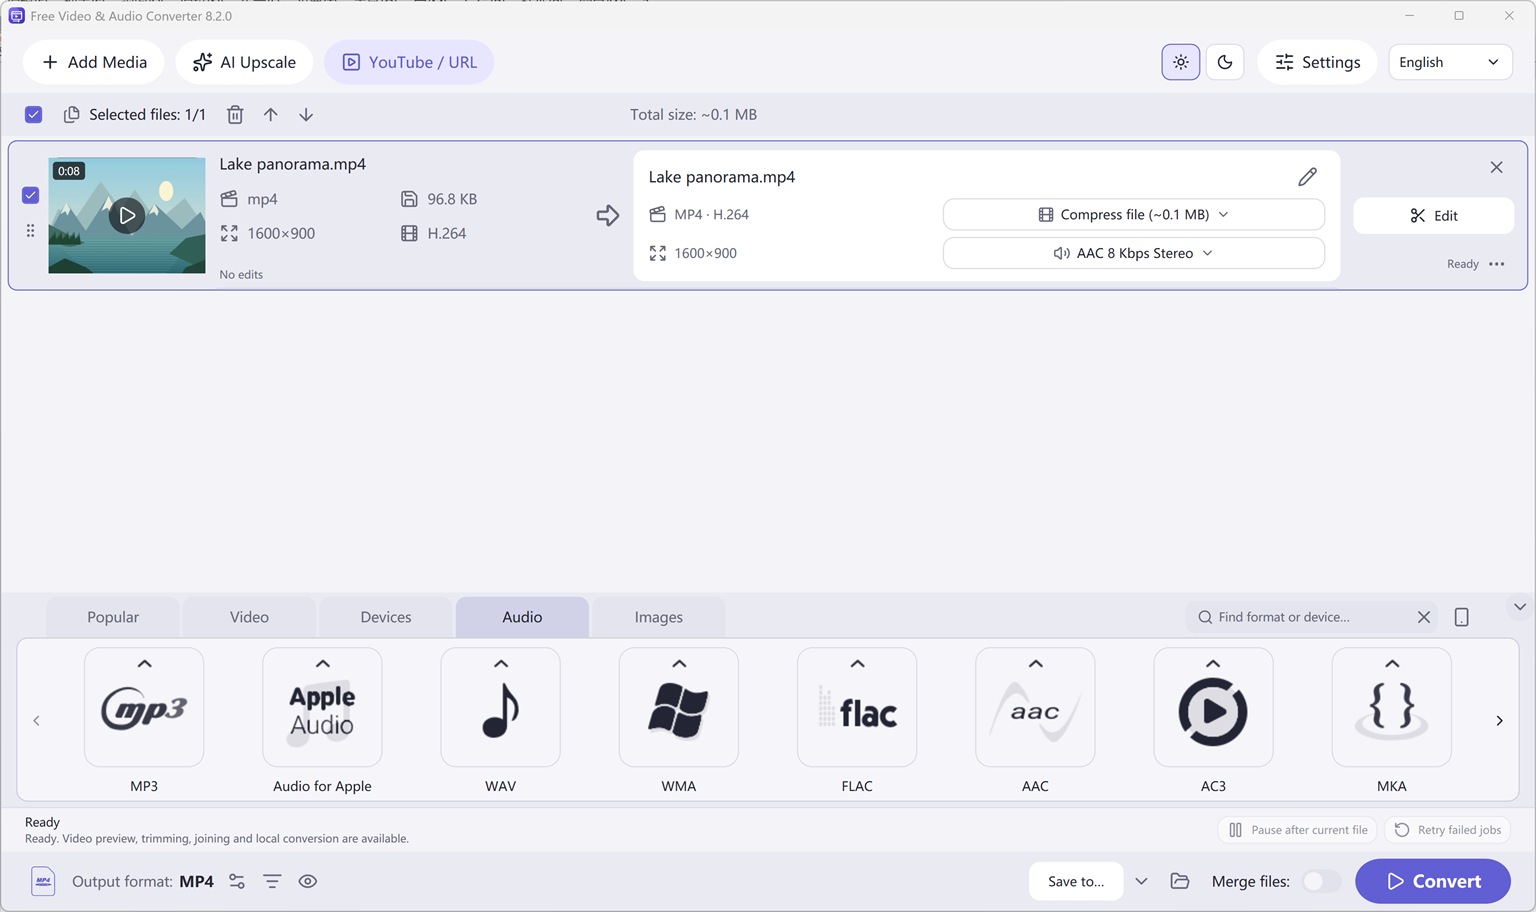
We consolidated Free Video to Audio Converter for Windows, Free Audio Converter, Easy Audio Extractor, Easy Video Switch, and Easy YouTube to MP3 Converter into one unified Windows x64 application: Free Video & Audio Converter.
All 428 output presets across Video, Audio, Devices, and Images—along with visual trimming, merging, cropping, subtitle editing, custom watermarks, target file-size compression, local AI upscaling, and DVD/Blu-ray authoring—are included for free.
How to Do It in Free Video & Audio Converter (Step by Step)
-
Step 1: Download Free Video & Audio Converter
Install and launch Free Video & Audio Converter on Windows 11 or Windows 10 (64-bit).
-
Step 2: Add Video, Audio, or YouTube URL
Drag local files/folders into the queue or paste a public URL via YouTube / URL.
-
Step 3: Choose Output Format & Convert
Select your target preset (such as MP3, FLAC, WAV, or MP4) and click Convert.
Button names in the guide below may differ slightly from the current version. In Free Video & Audio Converter, drag your files into the window, choose a format at the bottom and click Convert.
More Details & Tips
In the browser: a short file can be finished online. Open the tool from the link in this site’s front page, or read the new how-to posted here.
Introduction
Free Audio Converter is a completely free audio conversion tool designed for converting over 50 audio formats to most popular MP3, WAV, WMA and more with impressive high speed and nice sound quality. It drastically extends the usability of your music and recordings.
Step 1. Input Audio Files
Click “Add” and 3 ways can be applied to add audio files: “Add Files” is for one or more audio files; “Add Folder” is for the folder containing audio files; “Add Folder Tree” is for the folder along with its subfolders. Once the audio files are input, you can change their order by “Up” & “Down” or delete them from the list by “Remove”/”Clear”. If you want to extract audio from video files, you can input video files instead.
Step 2. Choose Quality Presets & Codec
In the menu of “Convert to”, select one conversion type from “Presets” and “Codec”. If “Presets” has been chosen, you will see a whole list of quality presets in the dropdown menu of “Presets”. Choose the one that best suits your needs. To adjust codec settings, click “Codec Options”. To specify effects and filter settings, click “Filters”. After that, click “Browse” to choose an output folder for the converted audio files or check “Same as source” to save them in the source folder.
Step 3. Start Audio Conversion
Now, start audio conversion by clicking “Start”. After conversion, you can click “Open” to open output folder to find the converted files.
More Features Available
To trim audio in audio trimmer, click “Trim”;
If there are needs to make all your audio files a well tagged collection for easier playback, click “Tags” and you can edit audio tag including artist, album, performer, genre, date, etc.;
For more detailed settings of various features, click “Edit – General Settings”:
General – check updates, register shell extension, choose temp folder and play reminder sound, check logs, etc.;
Encoding – set max parallel conversion processes allowed, enable trimming, keep logs, add encoder suffix, choose overwrite settings, etc.;
Artwork & Tags – extract artwork from audio or embed artwork to audio, resize artwork, copy tag, write tag, etc.;
ReplayGain – choose ReplayGain settings, prevent clipping, copy to lossless output from lossless source, etc.;
File Adding – use file length filter and format filter to filter out certain file types, use MediaInfo to read tags, etc.;
Interface – make the app always on top, show extra columns in file list and show text in toolbar buttons.