Music could be one of those little details you love when watching a movie or a video clip. But how would you feel when a lovely song is too noisy to hear the words clearly? Like everyone else, you would feel bad. There is a solution for this problem, though – to edit audio for video, and it is none other than Free Audio Editor. This is grand software with a number of really useful features, including an audio extractor and editor.

With just this tool you would be able to make the audio tracks of your videos sound better. Then, with another software tool, you can go ahead and add the tracks back to the initial videos. So, read on to know how you can edit audio for video – open a video file, extract its audio track, edit the audio, and save your resulting file as a video file.
How to Edit Audio for Video with Free Audio Editor
Part 1: Extracting Audio Tracks from Video
This part will have only 3 easy steps. They include the following:
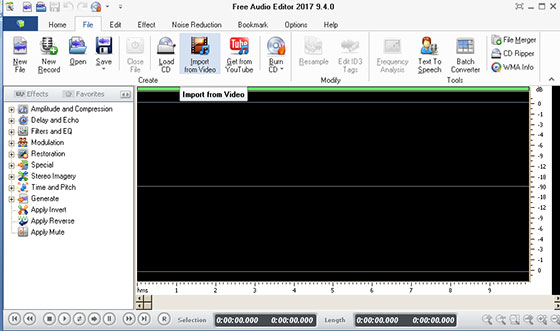
Step 1: Import Video
- Click “Import from video” as shown below. This will prompt Free Audio Editor software to generate an audio extractor that will enable you to remove an audio track from a video file.
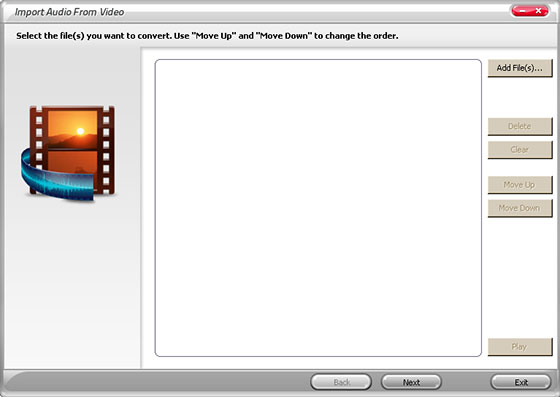
Step 2: Select Videos from Your Computer
- Click on “Add files”. All your video files will be listed in the order of input; but, if you want, you can rearrange your files in the list using the “move up” and “Move down” buttons. To remove a file, click “Clear”.
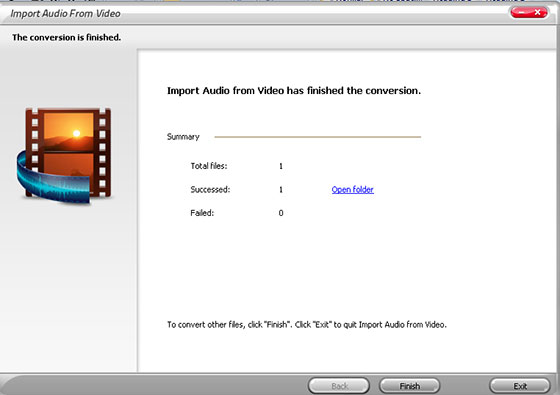
Step 3: Launch the Audio Extraction Process
Next, launch the audio extraction process by simply clicking “Next” and then “Convert” to whatever format you want (WAV, MP3, MP2, MFA, FLA, etc.). Once the software is done, you could tick this box: Play a sound when conversion is finished. Click “Finish” to convert more audios or “Exit” to stop importing more audios from videos.
Part 2: Editing Your Imported Audios
If you want to improve the quality of the video audio tracks you’ve just extracted, Free Audio Editor software is still the best choice. It is free and easy to use regardless of one’s inability to understand technical stuff. The best thing about this software is that it provides you with the simplest editing functions: copy, cut, paste, trim, mix, and repeat, insert and so on.
Additionally, you can use other advanced features like restoration, which entails noise reduction and expander. Others include Time and Pitch, Stereo Imagery, Apply Mute, Apply Invert, Apply Reverse, Amplitude and Compression among others. Here are three steps on how to use it to edit your audios.
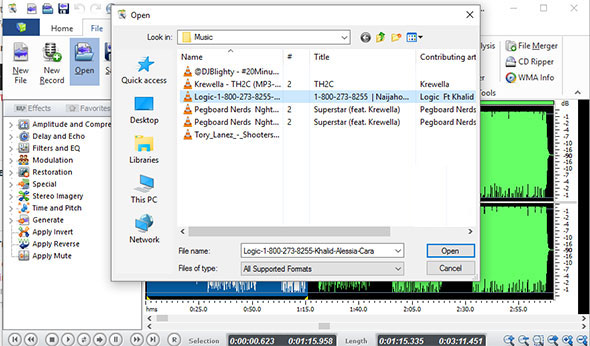
Step 1: Add an Audio File
First, click your Free Audio Editor to launch it. Then, click “Home” and then “Open”. This will let you browse your computer folders and pick the audio file you converted and saved earlier. Note: All files of the “All Supported Formats” will be viewable in the “Open” window. If you want to find out what other formats are there, just click the dropdown list at the bottom as shown below.
(You can drag the audio file you extracted from the video and drop it on Free Audio Editor)
Step 2: Edit Audio for Video
There are four methods of selecting a region of the file you want to edit. First, you may use this: Select to Start (Shift+Home), Select to End (Shift +End), Select specified Time (Ctrl+G) or Select All (Ctrl+A). Next, press the left mouse button to drag along the wavelength. This will drop you to where you wish to select a region. Third, denote the beginner and end of your session via moving the sliders. Lastly, you can now enter the start, end and length of time. This will help you select a specified region at the bottom of this editor.
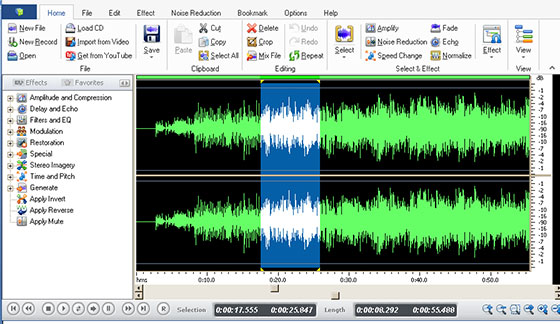
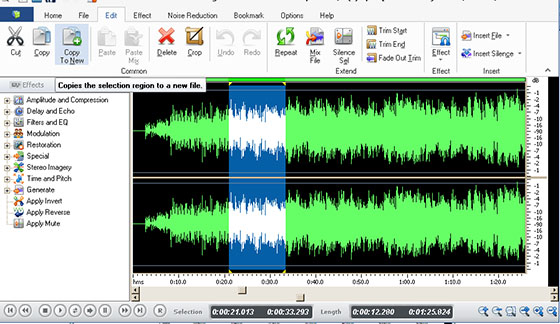
Click on “Edit” on the menu to launch the editing process. The Selected region does not have to be the same. You can edit it severally via, copy, paste, cut, redo, undo and other functions.
Step 3: Save the Changes
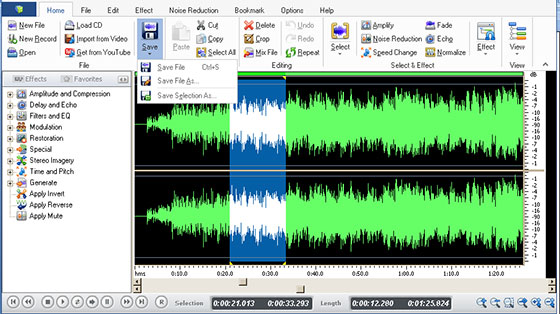
At this point you can return to the “Home” tab and click the “Save” icon from there. This will save all the changes to your original audio file. Alternatively, click “Save File As” to save your changes using a file name and location you can remember easily. Still, you can click “Save Selection As”. Then, select the output folder and format it. Also, adjust the output quality. Now you can freely use your edited music files on your PC music player or any other music device.
Note: Beginners find “drag the slider” technique much easier as it works for many situations. On the other hand, an experienced user of audio editors might want to use a number of PRO quality features just to enjoy the challenge.
Part 3: Add the Edited Audio Back to Video
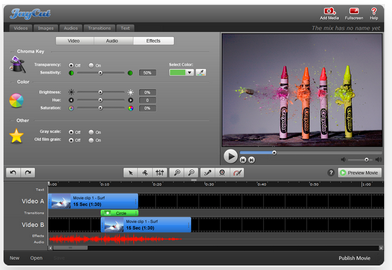
The process of adding your edited audio file back to the original video isn’t as difficult as you might think. At this point you will need a different software application than Free Audio Editor. Although there are several of them, we would highly recommend the JayCut. It doesn’t only help its users add the newly converted audio to the original video file, but to record it as well.
It is a convenient tool that is designed for those who love getting free music online. Besides recording, the tool can also edit, making it a complete tool for adding an edited audio back to video and more. Being a free to use software, you don’t lose anything by trying it. It can be one and only tool you use after Free Audio Editor has downloaded, converted and edited your music. A prestigious award winner that was created in 2007, JayCut is well recognized and you have nothing to fear.
After reading this article, you now know how you can download a video, extract a sound from it, edit audio for video with Free Audio Editor and add the edited sound to its original video clip. The next thing left now is to try it out.