Table of Contents
Introduction
You now have a neat, shiny new Apple iPhone and you’d like to transfer a DVD movie onto your iPhone. However, iTunes doesn’t have a converter to put DVD video on your iPhone! It won’t let you import many popular video formats either! So… how can you put Video DVDs on your iPhone? Easy Video DVD Copy is special conversion software that will convert your DVD-Video into a format that the iPhone can understand.
Step 1. Load DVD
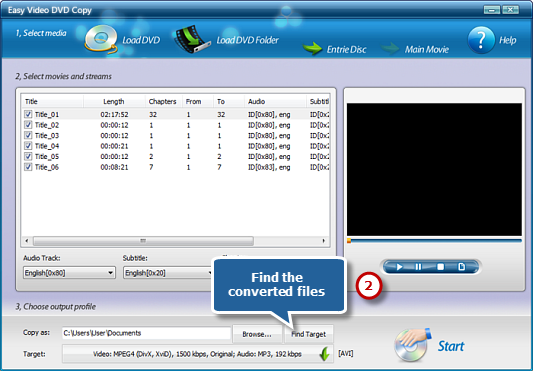
Insert a video DVD to the disc driver and launch Easy Video DVD Copy. Click “Load DVD” to load the inserted disc or “Load DVD Folder” to load the video folder.
Tips: Usually you insert the DVD-Video disc before clicking “Load DVD”, but if you insert the disc after clicking “Load DVD”, sometimes you may not find the disc in the “Select DVD Device” menu – use “Load DVD Folder” to find the Video Folder to load or instead, simply restart the program.

Step 2. Select What You Want to Convert
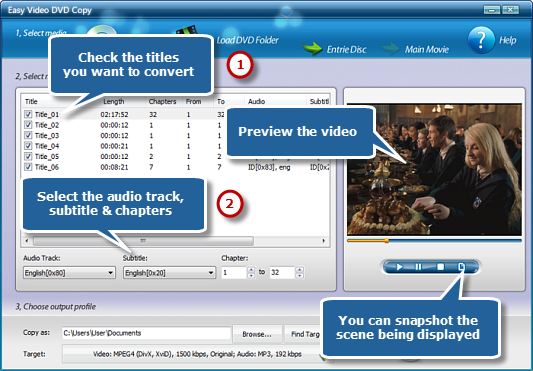
After you load the DVD, you can view all the titles listed in the window. Check titles from the listed window as wanted. Select Audio Track, Subtitle & Chapters of the tracks. This software allows you to preview the whole DVD or the selected title with our built-in DVD player. It also enables you to take a snapshot of the scene displayed.
Tips: If you need no sound or subtitle in the ripped video, just select “Disable” respectively in the “Audio Track” & “Subtitle” dropdown list. A hint to language learners here: the Audio Track & Subtitle don’t have to be in the same language, which means you can have English subtitle while hearing Spanish, and vice versa.
Step 3. Specify Output Settings
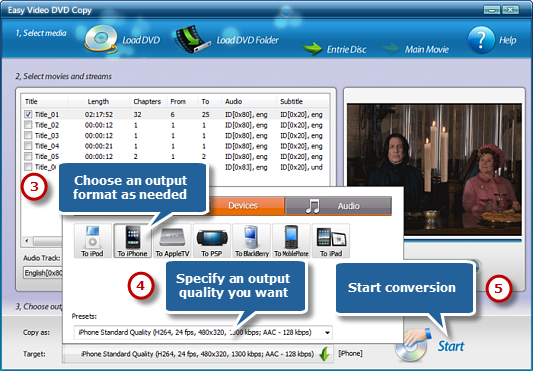
Click “Browse…” to choose an output directory to save the converted videos. Activate the “Target” menu and it will display 3 tabs for output formats: Video, Devices & Audio. Choose “To iPhone” from “Devices” tab. For specific needs, you can adjust the output quality with the well-configured presets for every format in the “Preset” dropdown list. Then, click “Start” to start conversion.
Step 4. Start Conversion
After you hit “Start”, a progress window will be displayed within just few seconds. The post-process options can be chose to play a sound or shutdown the computer when the conversion is finished.
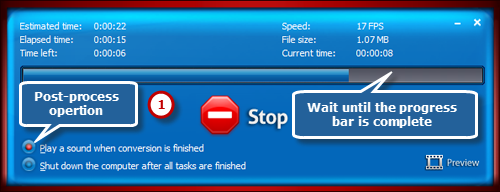
When the window disappears, the video has been successfully converted. If needed, click “Find Target” to directly open the output folder to get the converted DVD videos.