Table of Contents
Introduction
Get great homemade video clips much better than nut-shots and Lady Gaga parodies all over YouTube, thinking about burn your own movie DVD to share with your friends? Making video DVD is not so difficult with our Easy Burning Studio – just prepare your video collection for burning.
Step 1. Activate Video DVD Burner
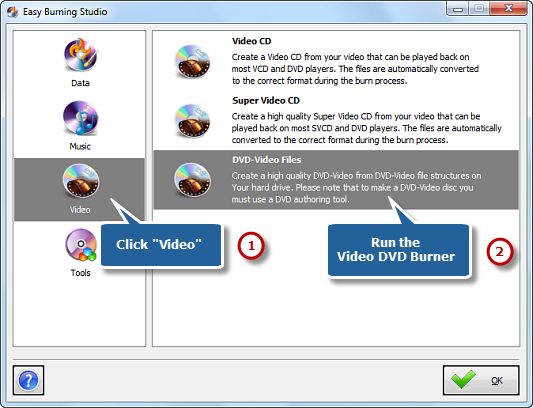
Insert a writable DVD into your disc drive and launch Easy Burning Studio. Click the “Video” and choose “DVD-Video Files” to run the burner wizard.
Step 2. Choose Burning Device
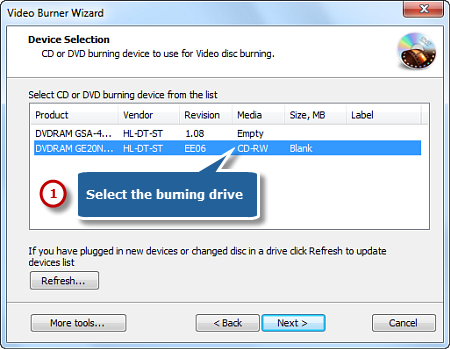
The burner automatically scans your system for the available drives. Choose one of the usable burning drives from the list (the system will select it by default if there is only one). Update the devices list by clicking “Refresh” button if you plug in new devices or change the disc in the drive.
Tips: If you don’t have a writable disc in your drive, you could not proceed and there will be a window that pops up and reminds you of this.
Step 3. Select Video Disc Type
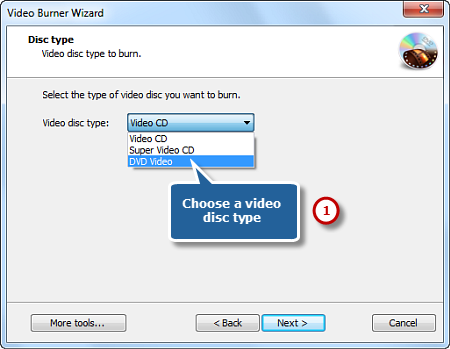
Select the “DVD Video” from the disc type menu of “Video disc type” (“Video CD” and “Super Video CD” burning are also supported).
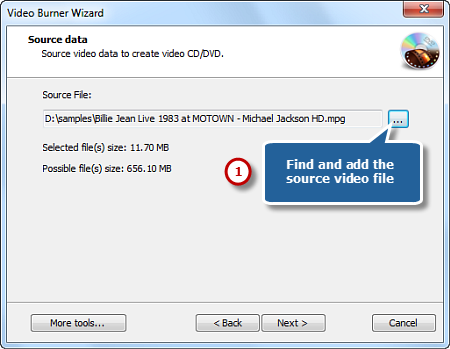
Step 4. Add Video Files
Add the source video you want to burn and you can have a review of the selected file size & possible file size.
Tips: If you don’t have a writable disc in your drive, you could not proceed and there will be a window that pops up and reminds you of this.
Step 5. Select Burning Mode/Speed and Start Burning
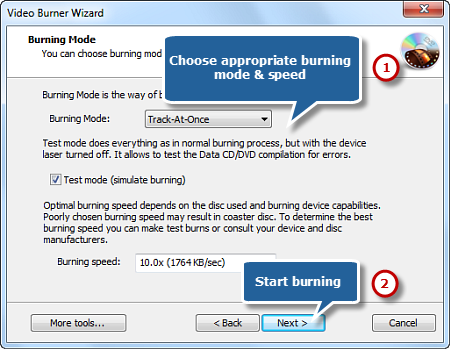
Select one burning mode from Track-AT-Once, Session Track-AT-Once, Disc-AT-Once PQ and Disc-AT-Once raw P-W. You are allowed to use Test Mode to simulate burning for checking errors. Then, choose an appropriate burning speed. Click “Next” to start burning and wait until the process bar reaches 100%. The disc will eject after the video DVD has been completely burned.
Tips: Test mode is good for finding the first bugs and glitches in your burning. If you are a first-time user, it is suggested to check the “Test mode” to avoid wasting of time & CD-R/DVD-R discs caused by misoperation or unpredictable errors; the burning speed is optional only when the burning device you are using provides different speeds. Usually we suggest a comparatively lower burning speed to avoid buffer underruns; it is suggested that you wait until your drive automatically ejects, instead of pressing optical drive eject button immediately when our program shows “Burning complete”.
