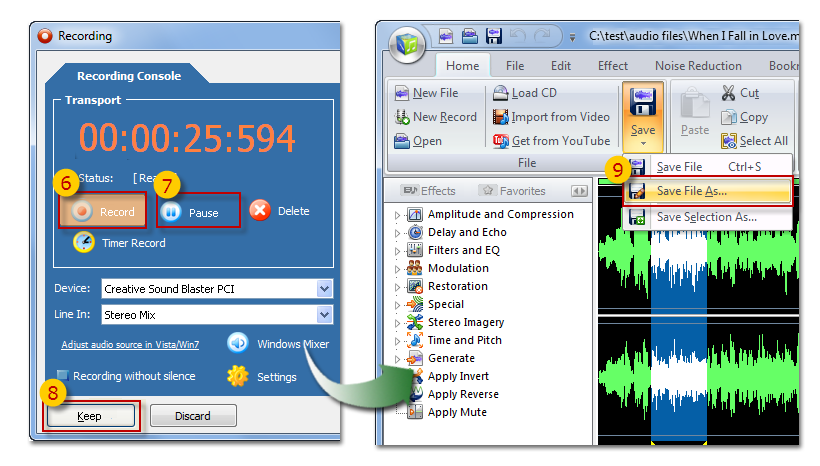
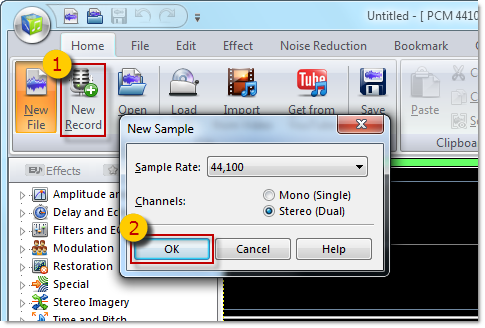
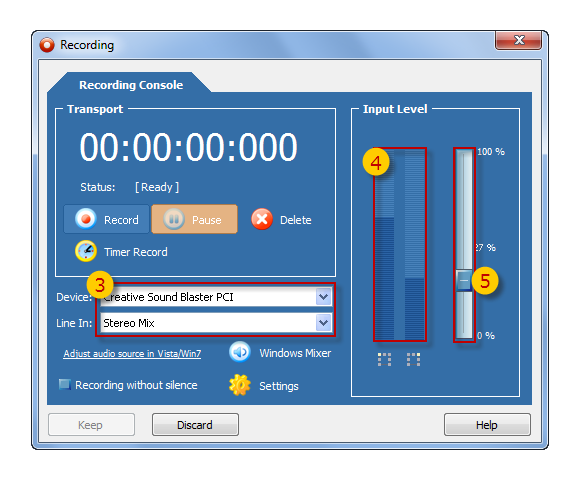
- Audio Record
- Record music on LP's, cassettes, tapes, CD/DVD player, AM/FM/Satellite radio, etc.
- Recording from the internet radio / internet-telephony / web radio
- Recording from microphone
- Recording from programs like WinAMP / Windows Media Player / Real Player
- Schedule a recording
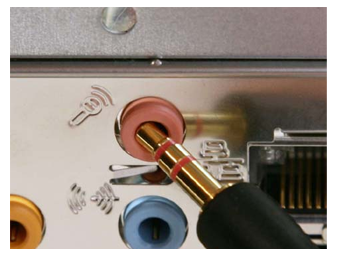
- How to Connect
- Change the audio source in Vista
Audio Record |
|
|||||||
|
||||||||
 Windows Vista