Free Audio Editor allows you to record BBC News from Internet radio stations, sound snippets from your favorite DVD movie, audio from a game… any sound that you can hear, you can record it. Simply click the record button and any sound will be saved to harddisk as a file for later listening or processing. This page will provide some guide on how to record audio using Free Audio Editor.
General Tips on How to Record Audio
- Keep the person like participants, interviewees and interviewers not too far from the mic. If the condition allows, each person should get a separate microphone.
- Place the microphone nearby the speakers rather than any sound sorce like background music, noises or conversations.
- Make sure there is a quiet recording environment that any equipment generating sound should be turned off. Keep windows closed to minimize outside sound.
- Avoid putting the recording device on the table, instead, it should be on something
If the microphone or recording device is on a table, set it on something soft because the noise may easily go through the table.

How to Record Audio
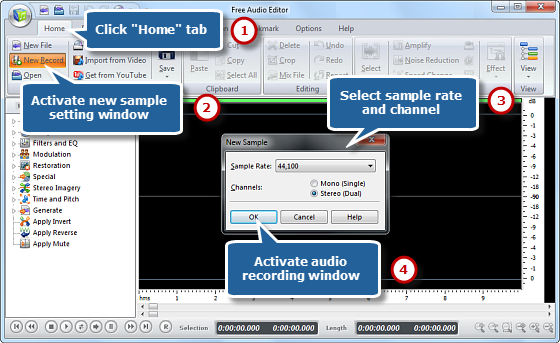
Step 1. Activate Audio Recorder
Launch Free Audio Editor. Click “Home – New Record” to select recorder sample rate & channel and click “OK” to activate audio recorder window.
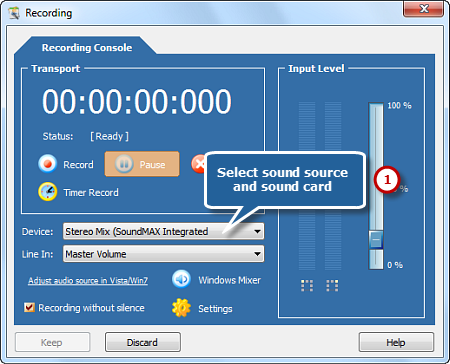
Step 2. Select Recording Source
Choose a proper sound card and select the sound source in your system. The names of the sound source to record streaming audios maybe different in various operating systems, usually named as Stereo Mix, Phone Line, Aux Volume, Video Volume, Mic Volume, Line In, CD Audio and so on.
Tips: If you do not choose the correct sound source, no audio signal would be detected or recorded even if you can hear it.
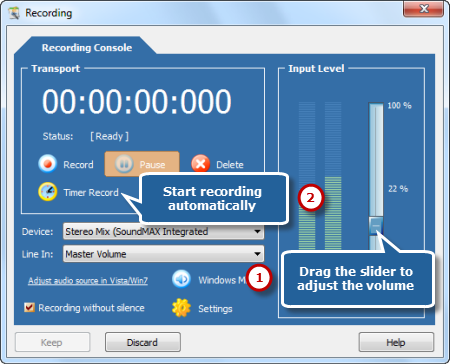
Step 3. Specify Recording Settings
Start to play the audio file you want to record and you can see wave variations in the wave pattern. Drag slider to adjust the recording volume. Set a specific time by clicking “Timer Record” to automatically start recording. You also have the power to record without silence.
Tips: If the volume is too low, you can see only very small variations in the wave pattern. If the sound is being clipped off because the volume is too high, move the volume setting down until most of the volume range is displayed without clipping.
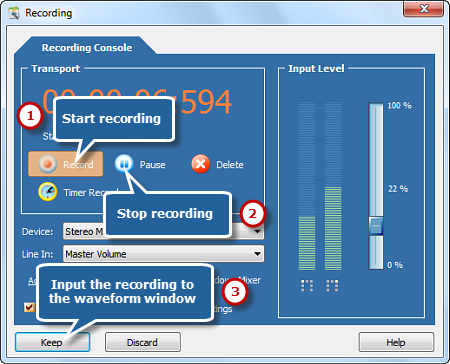
Step 4. Start Recording
After everything is set, click the red round record button to start recording. To stop recording, click “Pause”. Then, click “Keep” to input the recording to the waveform window of audio editor.
Step 5. Save the Recording
Now, the recording is displayed in the waveform window, you can edit it or add audio effects to meet your demands. You can just go back to the “Home” tab and click the “Save” button to save the changes to the original file or click “Save File As” to Start Recording with a different file name and/or location. After that you can select the output folder and format as well as adjust the output quality. Now, enjoy the recorded file on your music player!

FAQ

Q: What is the preferred codec for recording?
When you record audio, we recommend you to use an uncompressed lossless codec like WAV-PCM.
A: Can you tell me the minimum sampling rate for digital audio?
Sampling rate is actually the total number of periodic samples of the source material taken to reproduce it more accurately. The minimum sample rate for recorded audio should be at 44.1 KHz, although sometimes sampling at 96 KHz is encouraged.